Campaign Nodes
Getting Started with Agile CRM
Getting Started with Agile CRM
Campaigns are workflow automations composed entirely of nodes. Campaign Nodes are available on the left-hand side of the visual campaign editor. Whether you are creating a custom campaign or modifying a campaign template, you can add, remove, edit and connect nodes in the designer.
Let’s take a closer look at each available node and discuss some examples of how they are used in sales and marketing automation campaigns.
The most-used campaign nodes are available in two tabs on the left-hand side of the campaign editor.
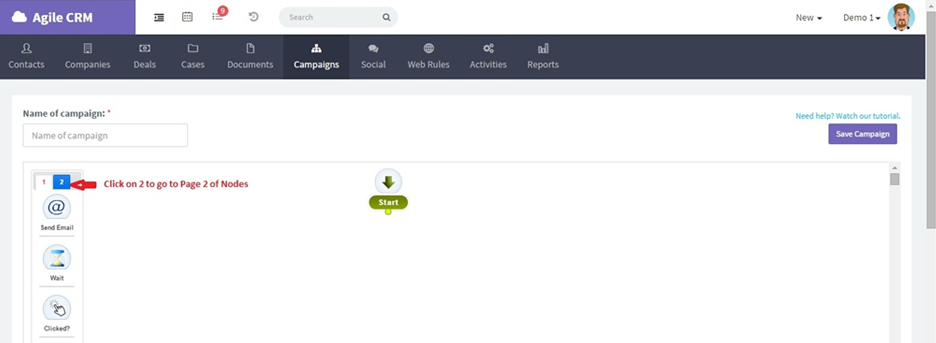
Each node has a specific function:

Send Email - Send a particular email to the contact. This node lets you compose a text or HTML email, though we recommend using the HTML format whenever possible so that you can track email opens and link clicks.

Wait - Pause the campaign for a certain amount of time. Select how many minutes, hours, days or business days to wait until moving to the next node in the campaign. For example, you might want to wait a week before sending a second onboarding email to a new customer.

Clicked - Check if a link has been clicked by the contact within a particular time frame. Link tracking works with emails (for all users) and SMS messages (if you have enabled an SMS/telephony integration). You can specify the time frame in days, hours or minutes.

Opened - Check if the contact has opened any of the emails sent within the campaign. You can specify a time frame in days, hours or minutes.

Tags - Add or remove tags. You can add one tag or multiple tags to the contact, or delete one tag or multiple tags from the contact. Learn more

Score - Change the contact’s Lead Score. Automatically adjusting lead scores based on contact actions helps sales and marketing teams find the hottest leads. For example, you might want to increase the lead score when someone clicks on a link leading to your product demo.

URL Visited? - Check if the contact has visited a certain URL. You will need to specify the URL link within this node along with a duration. This duration is for the node to check if the contact visited that page in the last x days or x hours.

Tweet - Send a Tweet to the contact on Twitter. The Tweet will only be sent if the contact’s Twitter ID is logged in their contact details in your Agile account (ie. if their Twitter profile has been added to their contact info in Agile). Also, you need to authorize Twitter within the campaign:

In the Tweet node, allow Agile to access your account.
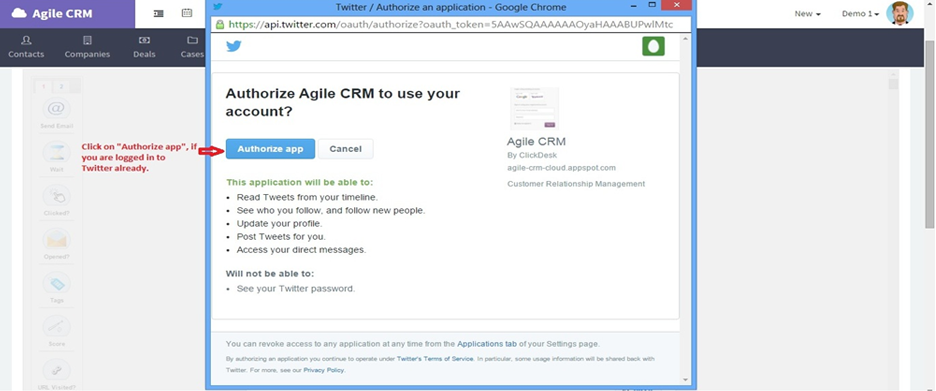
Make sure you’re logged into Twitter, then click on Authorize app. Your User ID, Token and Token Secret will fill in automatically.
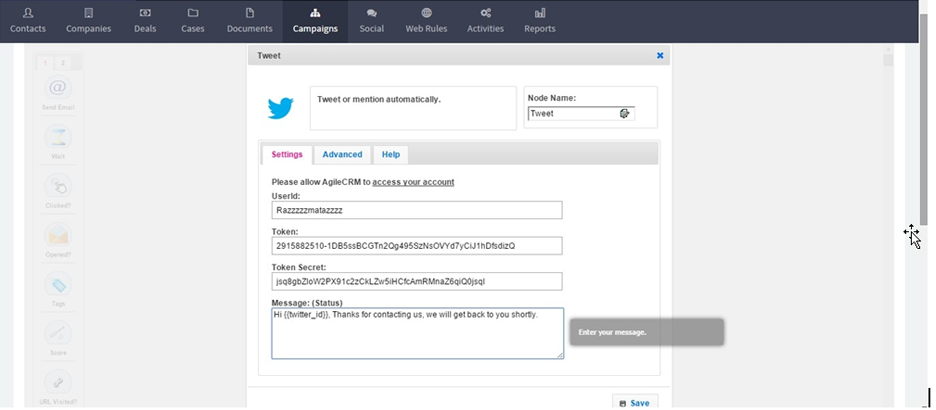
Under “Message (status)”, enter the Tweet you would like sent to contacts when they reach this campaign node.

A/B - Set the frequency for an email A/B test. Split testing is a way to check which message is more effective. Some contacts receive Email A, some contacts receive Email B. The A/B node lets you define what percentage of contacts will receive Email A (0.5 for 50%, etc.). You can then track email opens using the Opened node and add tags (such as “Opened Email A” and “Opened Email B”) using the Tags node.
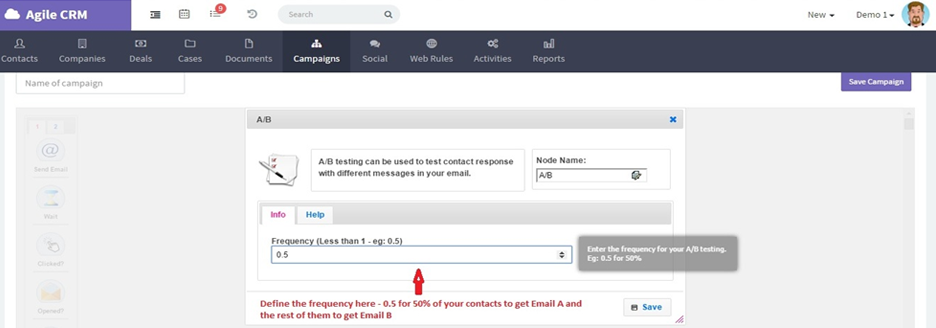
To set up an Email A/B test, add the A/B node to your campaign and set the frequency.
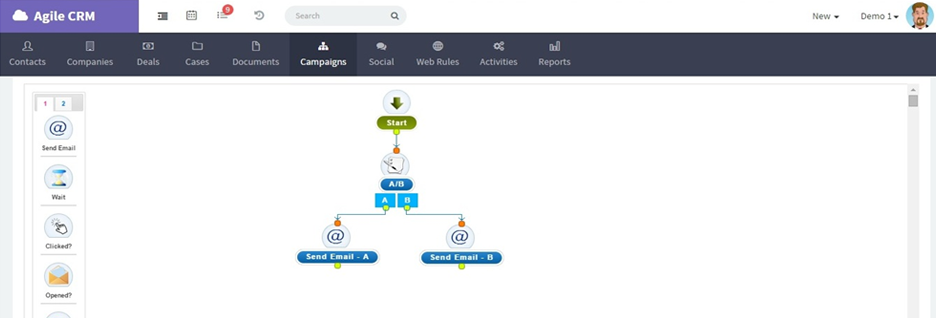
Next, add two Send Email nodes: one for Email A and one for Email B. We recommend adding multiple Tags nodes to track email interactions, such as a tag for “Sent Email A” and another tag, following an Opened node, for “Opened Email A”.

Add Task - Add a task for you or another user. For example, after sending out an introductory email, you may want to have a follow-up task automatically added to your calendar a few days later.

Add Deal - Add a deal to the contact. For example, you might want to add a deal to a contact when they visit a particular page on your site, following a proposal email.

Add Note - Add a note (subject and message) to the contact.

Check Tags - Check the contact for a particular tag. For example, you might want to check if contacts have a “Paid” tag, indicating that they are paying customers, and if so send them relevant messages for upgrades rather than for sign ups or free plans.

Transfer - Transfer the contact to a different campaign.

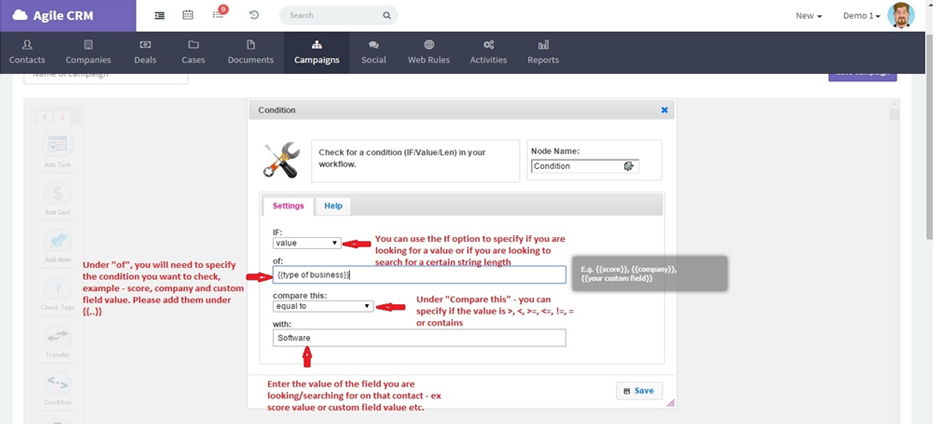
Condition - Check if a certain value exists on a customer. For example, you can check if a contact has a certain lead score or custom field value, or if the contact belongs to a certain company.

Set Owner - Set or change the owner of the contact. For example, you might want to transfer the contact from a marketing rep to a sales rep.

JSON IO - Push and retrieve data from other applications by integrating your automation workflow (in Agile CRM) with your web infrastructure. Please note that this node should only be used by developers! For more information, please see our JSON IO Node documentation on GitHub.
The nodes discussed so far are all available directly from the main Nodes sidebar when you’re editing a campaign. However, there are even more sales and marketing automation nodes!
To see these nodes, click on Add More below the node icons already discussed.
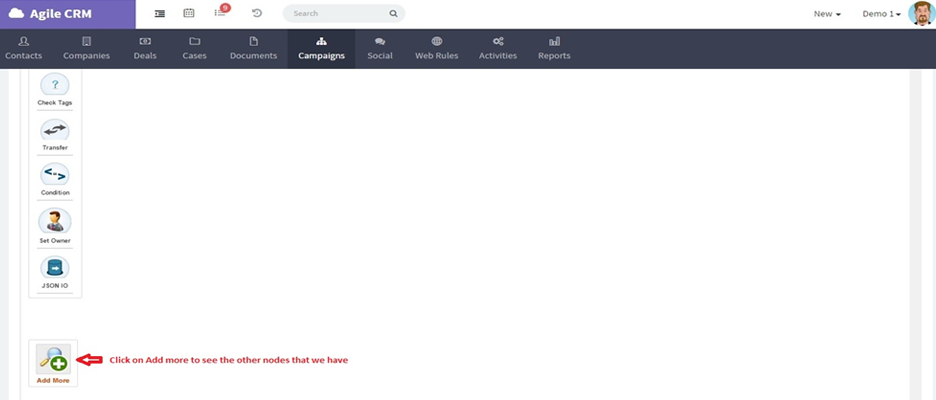
This opens a window with all available campaign nodes in Agile CRM, organized by type: Contact, Email, Mobile, Web, Social, Utilities, Developers.
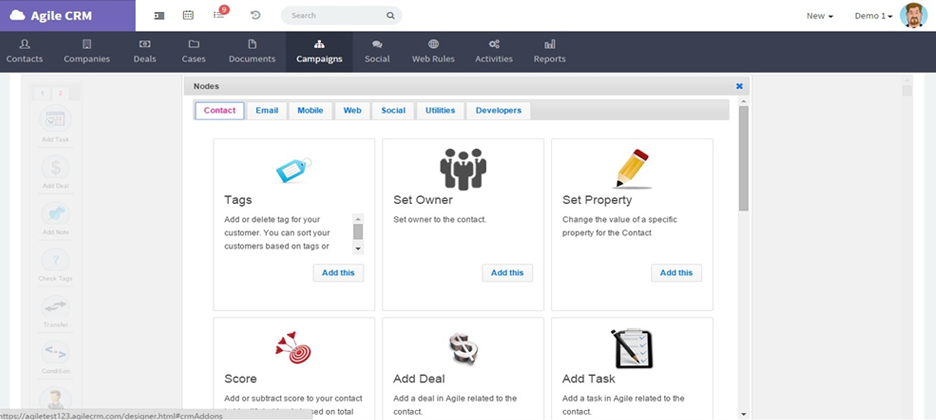

Set Property - Change the content/value of a property/field for the contact, such as the contact’s company name or website address. The new value you enter will replace any previous values.

Change Deal Milestone - Change a deal milestone for a deal associated with the contact. For example, if you’ve sent out an email proposal to a number of contacts, you might use the Change Deal Milestone node to automatically change the deal milestone from New to Proposal when a contact opens that email message.

Add Case - Add a case to the contact. Cases are helpdesk/support issues. You can set the case name, owner, status and description with this node.

Close Case - Closes all cases associated with the contact and owned by the user you select in the node.

Unsubscribe - Unsubscribe the contact from a particular campaign or all campaigns. For example, if you would like your contacts who have paid to no longer be active in a pre-sales campaign, you can use this node to automatically remove them from that campaign when they make a payment.

Close Task - Closes a task associated with a contact. For example, you might want to automatically close a task that was set to remind you to do something that has already happened in the campaign, like emailing a customer or setting a meeting.

Add Event - Adds an event to your Agile Calendar and associates it with the contact.


Wait Till - Wait until a specific date and time to move to the next step in the campaign. This node essentially pauses the campaign. You can choose the desired calendar date, time of day, and time zone. You can also use a merge field for the date.

Has Deal? - Checks if the contact is already associated with a particular deal (or any deal). You can check for any deal and any owner, or select a particular deal (deal track and milestone) and/or specific owner.

Check Business Hours - Checks if the current time is within the business hours you’ve set. For example, if you would like to create a task for yourself to call a contact a few minutes after they sign up, you can use the Check Business Hours Node to check if the contact has reached this node within your set hours. If yes, then you can have the campaign create a task for you to make the call; if no, then you can set up the campaign to assign the task to an owner working in an appropriate time zone.

Notify - Sends a notification to a particular Agile user or set of users. You can set the message and who it should be sent to: all users, a particular user of your choice, or the owner of the contact.

Check Campaign - Checks if the contact has already been added to a particular campaign. Also checks the campaign status (whether or not the contact has completed the campaign).

Has Event? - Checks to see if the contact has already been added to a particular type of event. Users often link the Add Event node to the “no” condition and nodes such as Send Email or Send Message to the “yes” condition.
The nodes listed above make it easy to create custom sales and marketing automation campaigns. Have an idea for a node that doesn’t exist yet? Add it to our active user community on UserVoice. Interested in new nodes currently in beta? Check our Product Updates for new releases and feature enhancements.