Web Rules
Getting Started with Agile CRM

Web Rules automate actions in response to user activity on your website. You can use web rules to show popups, surveys or forms, automatically increase a lead score, add contacts to a specific email campaign when they visit a specific product page, and much more.
For example, when visitors are about to leave your website, you can show them a popup with a signup form for your email newsletter. Or when one of your Agile contacts visits a specific product page, you can automatically send them a personalized email asking if they need a demo.
In this Getting Started Guide, we’ll learn how to set up Web Rules, how to create a Web Popup, and how to add Agile Analytics code to your website so that web rules work correctly!
For web rules to work, you need to add Agile Analytics code to your website. (Don’t worry, it’s a fast and easy process -- we’ve already done the complicated part for you.)
Login to your Agile Dashboard and go to Admin Settings > API and Analytics.
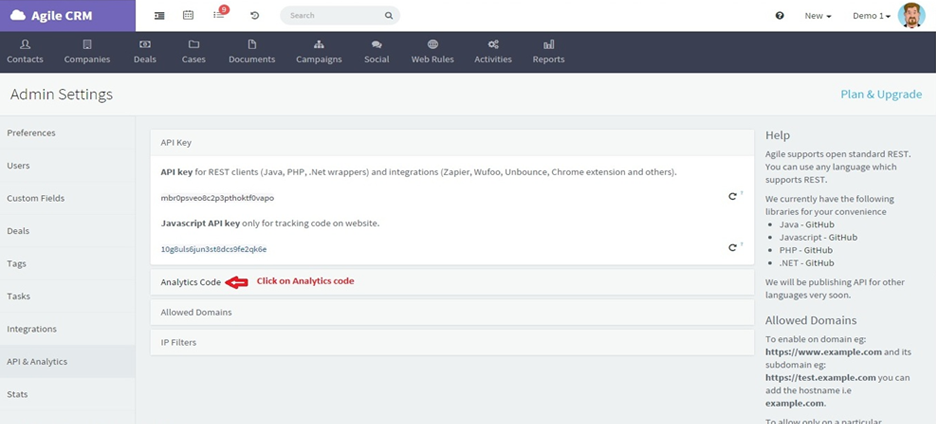
Click on Analytics Code.
The Analytics Code section of the page expands to show your personalized web analytics code for integrating your website with your Agile account.
Click on the Tracking code with Web Rules enabled tab.
Copy that code and paste it in the Header or Footer of your website’s HTML code. This ensures that web rules and visitor tracking will work on all pages of your site.
Now let’s learn how to take advantage of that new code to create popups, web forms, and other automations in response to contact activities.
Open the main Web Rules page in your Agile Dashboard.
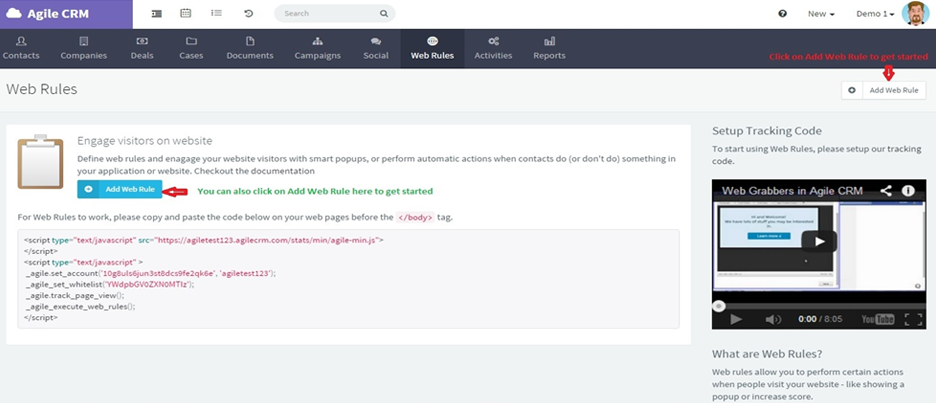
Click on + Add Web Rule.
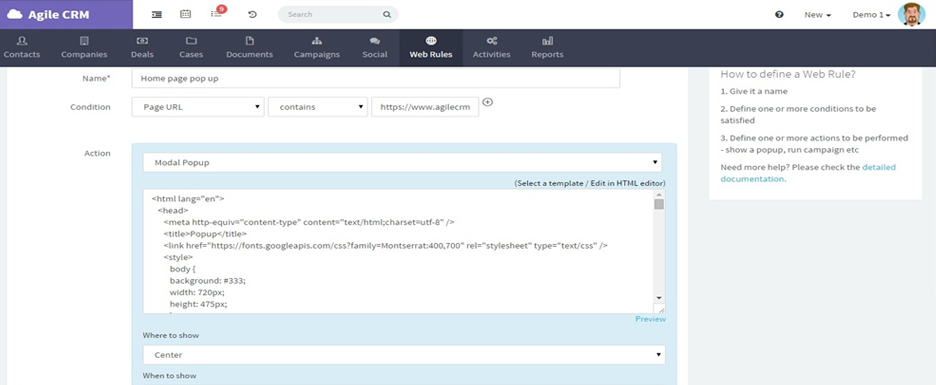
You’re required to name the web rule, define a condition to be satisfied, and choose an action to perform when that condition is satisfied. Beyond those basic requirements, you can make your new web rule as simple or complex as you’d like.
The default Web Rules form only shows one condition. To add more conditions, just click on the + (plus sign) next to a current condition.
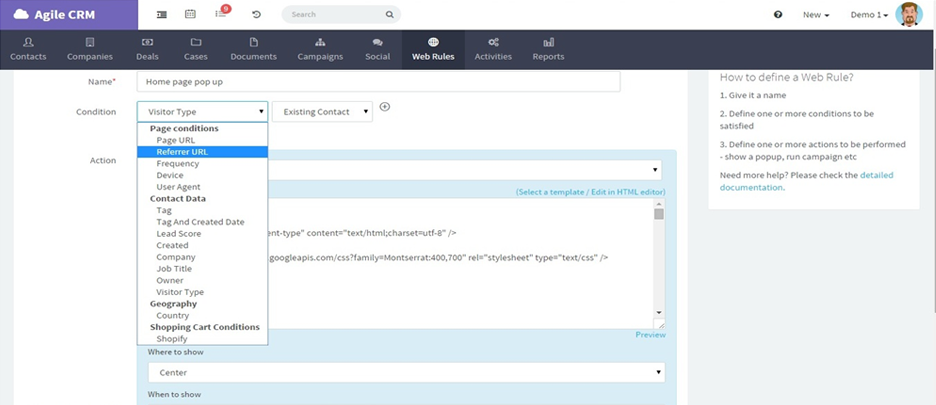
Under Conditions, you have the following options. We have defined them here for a popup, but they work with any of the available actions, such as changing a contact’s lead score.
* Conditions marked with an asterisk only work when an existing contact (someone already added as a contact in your Agile account) visits your website.
After you have defined the desired conditions for this web rule, you need to choose which Action or Actions to perform. Available Actions include displaying a popup or notification (“noty”) message; adding or removing a contact from a campaign; adding or removing a tag; changing the contact’s lead score; or executing some custom JavaScript code (in that case, you can enter the JS code directly in the Action window).
Popups require extra setup steps. Please keep reading below to complete the process.
When you are finished setting up your new Web Rule, remember to click Save!
Agile provides a number of free templates for web forms and popups. You can also paste HTML code from a popup you already created elsewhere. In this example, we’ll set up a basic web popup.
After clicking + Add Web Rule (see above), select Modal Popup under Actions.
If you already have the HTML code for your popup you can paste it in the HTML box. Otherwise, continue with the following steps to create a popup using one of Agile’s free templates.
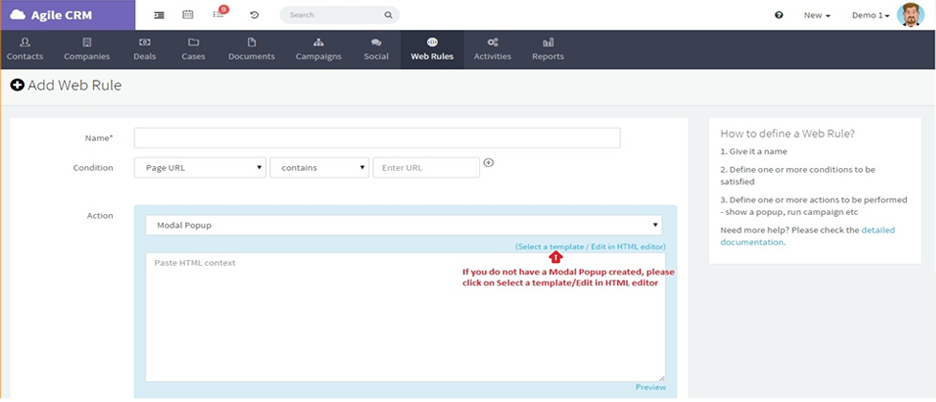
Click on Select a template/Edit in HTML editor.
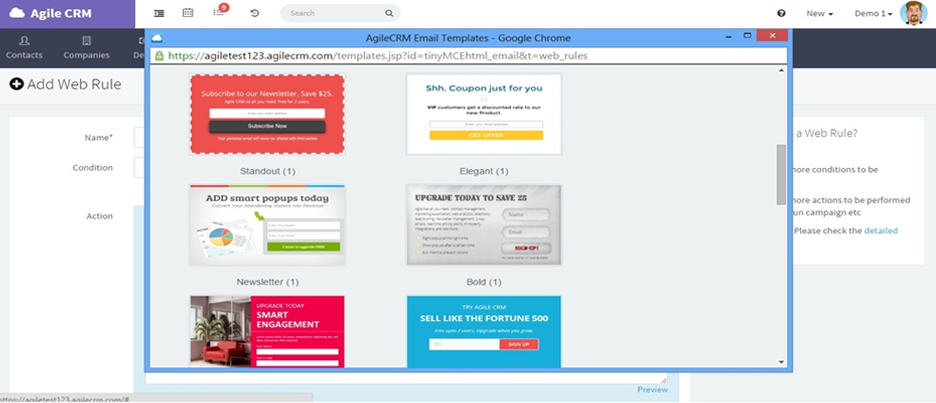
Choose a template in the window that pops up. Templates that include entry forms for name/email include code that will automatically add new signups to your Agile CRM account as contacts.
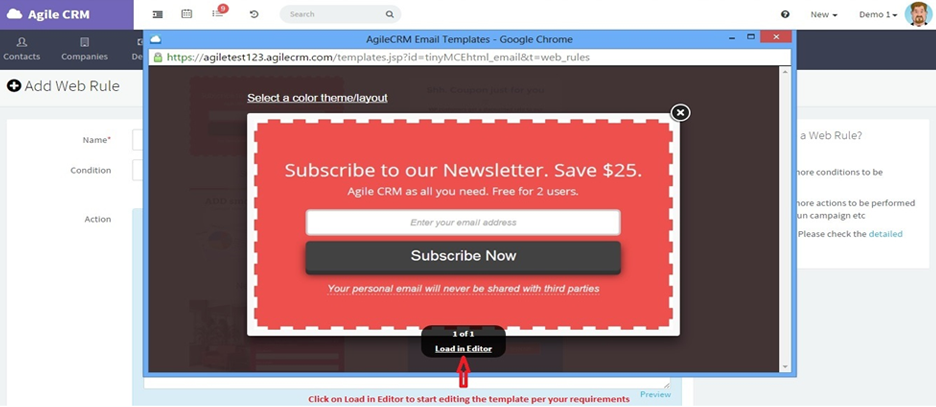
When you click on a template, you’ll see a preview of the popup. If you like what you see, click on Load in Editor.
Edit your popup visually, or go to Tools > Source Code to edit the HTML directly.
Click Save and the HTML code for your customized popup will appear in the Modal Popup’s HTML window.
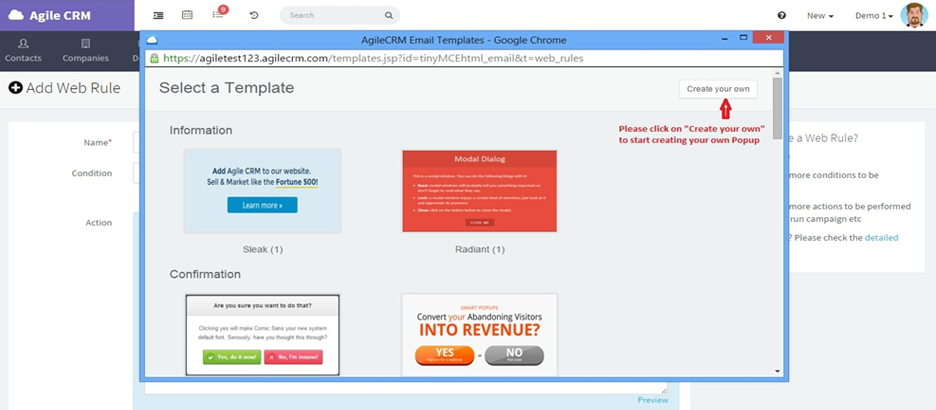
Another option is to create a popup from scratch. To do this, click on Select a template/Edit in HTML editor and then click on Create your own.
Create a popup using our visual HTML editor. You can add images, text, links, etc.
As with our pre-designed templates, just click Save when you’re done editing and the HTML code you’ve created/modified will be added to the Modal Popup’s HTML window.
After you finish designing the popup, you’ll need to define where to show the popup and when to show it.
Where to show refers to the placement on the web page.
When to show refers to the visitor’s browsing behavior. For example, you can choose to show a popup only when a customer scrolls to the bottom of the page or when they are about to exit the page.
Once your popup is complete, click Save to add it to your site.